
Blog
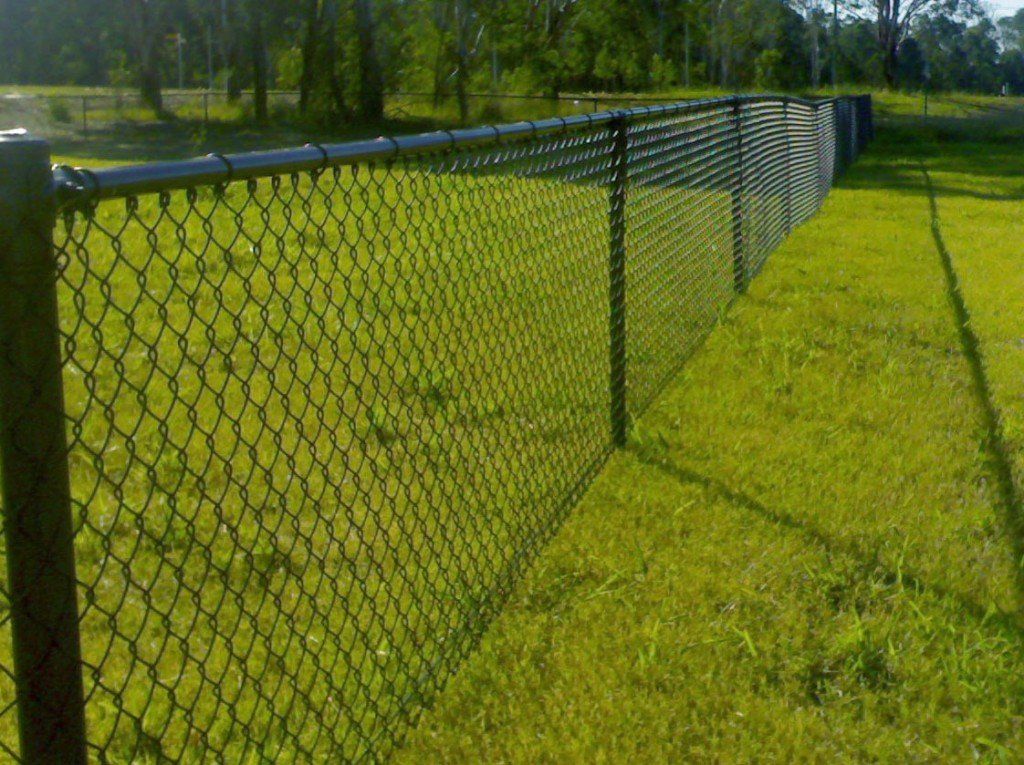
How to Install a Chain Link Fence Depending on the area, installing a chain-link fence can be completed in a day or two. Chain link fencing is one of the least expensive options available. It is made up of a metal chain link fabric that is attached to a series of metal fence posts with the help of special post hardware. This guide will show you how to instal a chain-link fence step by step. Prep the Project Planning and preparation are required when installing a chain link fence. Before constructing a chain link fence, follow these steps: Some local building codes place restrictions on fence height, location and other factors. Check with your local building department to determine if a permit is necessary. Find your property line. Figure out where you want your fence positioned about your property line. Your local assessor's office can provide information on your property line. Determine fence size and what kind of material you'd prefer. Fence height is based on the chain link fabric size. Chain link fabric or mesh comes in linear feet. It's usually sold in rolls 4-feet, 5-feet or 6-feet high. Galvanized steel is the most robust mesh. Buy enough to cover the fence perimeter less any gate openings. Aluminium is lighter. Tip: Share any fence plans with bordering neighbours to mitigate future disputes. Gather Materials Understanding which parts you will require is part of knowing how to build a chain link fence. 1. Line Post Cap secures the top rail. One of these should be used for each line post. 2. The top rail runs along the tops of the posts. Use the identical linear footage for the entire fence. 3. An end post cap is also known as a "terminal cap." One of these should be used for each end post. 4. Rail Ends are caps that go around the rail at each end, gate, and corner post. Each end post, each gate post, and each corner post should have one. Tension bands keep the tension bar in place. Use three for each end of the fence and the gate post. Six should be used for each corner post. for fences up to 6-feet tall. 5. Tie Wire ties the chain-link fabric to the top rail and line posts. Use one for every 24-inches of the top rail and one for every 12-inches of each line post. 6. Chain Link Fence Posts support the top rail and chain-link fabric. Use one of these within every 10-foot run of fence. 7. Tension Wire adds rigidity to the bottom of the chain-link fabric along the bottom. Use the duplicate linear footage of this for the entire fence. 8.End Post / Corner Post adds support and rigidity to the chain-link fabric. Use one for each end of the fence at each corner. Use two for each gate opening. 9. A tension Bar is a vertical bar woven into the ends of the fence fabric at each end post, gate post and corner. Use one for each end post and gate post and two for each corner. Below are some additional pieces to consider if you want to understand how to install a chain link fence: Top Rail Sleeve connects two runs of the top rail. Use one of these for every two top rails that must be joined. Gates come pre-assembled. Use one for each opening you wish to create. You can create a double opening using two gates. Gate Post Hinge to mount to the post. Use two for each swinging gate. Gate Frame Hinge to mount to the gate. Use two for each swinging gate. Brace Bands hold the rail ends and mount them above the tension band. Layout the Fence Most instructions on putting up with a chain-link fence begin with determining the layout. Set your fence about 4-inches away from your property line to avoid any property line issues with neighbours. This distance will likely be dictated by your local building code and may be slightly different. Lay out the fence perimeter using batter boards and mason's line. Start with this line if running your fence parallel to the house. Then run perpendicular lines to complete the perimeter, crossing the mason's line at the corners. Square the corners using the 3-4-5 method. Measure 3-feet from where the lines intersect and mark the string line. Measure 4-feet along the line that runs perpendicular to that line and make a mark. Measure between the 3-foot and 4-foot marks. Adjust the line until the marks are precisely 5-feet apart. Mark fence post locations based on fence panel dimensions using spray paint. Use a fence post that's no more than 10-feet high. When laying out posts for the chain link fence gates, leave an extra three 3/4-inches between the posts. This will make room for the hinges and latch. Refer to the manufacturer's instructions for specific measurements. Tip: Before digging holes, call 811. Your local utility company will mark where any water, gas, and power lines in your yard. Prepare Post Holes Posts are available in two sizes. Corner and end posts have a larger diameter of two 3/8-inches. For line posts or other fence posts, the smaller diameter is one 5/8-inch. Digging the post holes correctly is an important step in constructing a chain link fence. A post hole digger or a two-person auger can be used. Dig post holes three times wider than the post diameter. Dig 6-inches to 8-inches for end and corner posts. Dig 4-inches to 6-inches for line posts. Make the holes a third of the length of the pole length plus 4-inches for gravel. Fill all the holes with 4-inches of gravel. Tamp using a hand tamper or 4-foot x 4-foot post. For the end, corner and gate posts, add 6-inches of concrete to the hole. Leave the other holes empty. Set Posts The key to a solid and sturdy chain link fence system is to set the end, corner, and gate posts in concrete. Before proceeding, ensure that the posts are properly installed and that the concrete has completely cured. Make sure the concrete mix is not too thin. It should be the consistency of thick cake batter. Follow the manufacturer's instructions or purchase ready-made cement. Put posts in the wet concrete and plumb them with a level. Have a helper hold the posts plumb or brace them using stakes. Finish filling in the corner, gate and end post holes with concrete. Check the posts for plumb after every few shovelfuls and adjust as needed. Slope the top of the concrete, so water drains away from the posts. Let the concrete cure for two to three days, according to the manufacturer's instructions. Do not fill the holes for the line posts with concrete, and don't put the line posts in place. Attach Tension Bands and Gate Hardware Tension bands hold the tension bar in place, giving the fence fabric its vertical rigidity. Slide tension bands onto each corner, gate and end post. The bands will help hold the mesh in place once it's installed. You will use three for a 4-foot fence, four for a 5-foot fence, and five for a 6-foot fence. Put fence gate hinges and latch hardware onto the gate posts at roughly their final positions. Hinge height will depend on your gate dimensions and design. Slide a brace band over each end and gate post and two over each corner post. Use a rubber mallet to drive end post caps onto the gate, corner and end posts. Install Caps & Rails Install line post caps and attach rails. Drive looped line caps onto the line posts with a mallet. Put the posts in their holes, but don't fill the holes. Bolt a rail cap to each brace band, tightening just enough to hold the cap in place. Feed the rails through the looped caps. Cut rails with a pipe cutter or hacksaw, if needed. If you need longer rails, join them together. Use rails with a slightly smaller wedged end that fits into a full-size rail or a top rail sleeve. Be sure to deburr the ends of all cuts using a file if necessary. Fit the rails into the rail caps. Raise or lower each cap to the final height of the mesh. Allow 2-inches of clearance at the bottom. Tighten the brace bands to secure the rail height. Fill the holes around the line posts with dirt and tamp until firm. Be sure to keep the posts plumb as you fill the hole in. Unroll the Fence Fabric and Install a Tension Bar Lay the chain link mesh on the ground outside the fence. Weave the tension bar through the links at the end of the mesh. The bar makes the end of the fence rigid and provides something to attach to the posts. Attach Tension Bar to Post Stand the mesh up. Slide the tension bar between the opening on the tension bands. Run a bolt through each tension band to lock the tension bar. Use a socket wrench to bolt the tension bar into the tension bands on one of the end posts. Align the mesh, so it overlaps the rail by 1-inches to 2-inches and sits about 2-inches above the ground. Stretch the Fence Fabric Chain link fence fabric must be pulled taught, or it will sag. You can do this using a come-along cable puller winch and stretcher-bar. Insert a tension bar about 3-feet short of the corner or end post you will end the mesh on. Hook the stretcher bar to it. Crank the cable puller until the mesh loops move no more than 1/4-inch when you squeeze them together. Tighten the Fence Fabric Pull on the mesh to reshape it if it changes height or becomes distorted while tightening. Weave a tension bar through the mesh without releasing the fence puller. Make sure it's close enough to the tension bands on the end post closest to the fence puller. Help can make installing a chain link fence easier. Consider hiring one or two people to assist you. Remove Excess Mesh To remove the excess mesh between the tension bars and end post, open a loop at the top and bottom. Twist and pull the strand free. Tighten Tension Bands Pull the tension bar into the tension bands on the end post. Tighten the bolts on the bands with a socket wrench. Release the fence puller and remove the tension bar and stretcher-bar. Repeat the entire hanging and stretching process along the remaining sides of the fence. Tie the Fence Fabric to the Rails Bend one end of an aluminium tie wire into a hook. Grab the bottom strand of the opening above the rail. Loop the tie wire around the top rail. Pull it firmly and tie it back onto the mesh. Space the tie wires about every 24-inches along the top rail and then attach them to the line posts every 12-inches to 16-inches. Finish Fence The final step is to wire the bottom loops of the fence fabric. Thread a tension wire through the bottom loops of the mesh and tighten it around the end posts. Wrap the wire around itself several times to fasten it. An alternative to threading the wire is to attach it to the mesh every two feet or so with hog rings. Now that you know how to install a chain link fence, you are one step closer to a new fence. Chain link fences can be a budget-friendly option to define your property, keep pets in and give you more security. However, a chain link fence won't give you much privacy. Consider using chain link fence accessories such as privacy slats, and weave the slats on a diagonal through the mesh. Don't be concerned if you don't have all of the tools required to complete this DIY project. At your local tool store, you can rent tools for any project. If figuring out how to put up a chain link fence isn't your thing, we offer installation services at Pro Fences Brisbane .
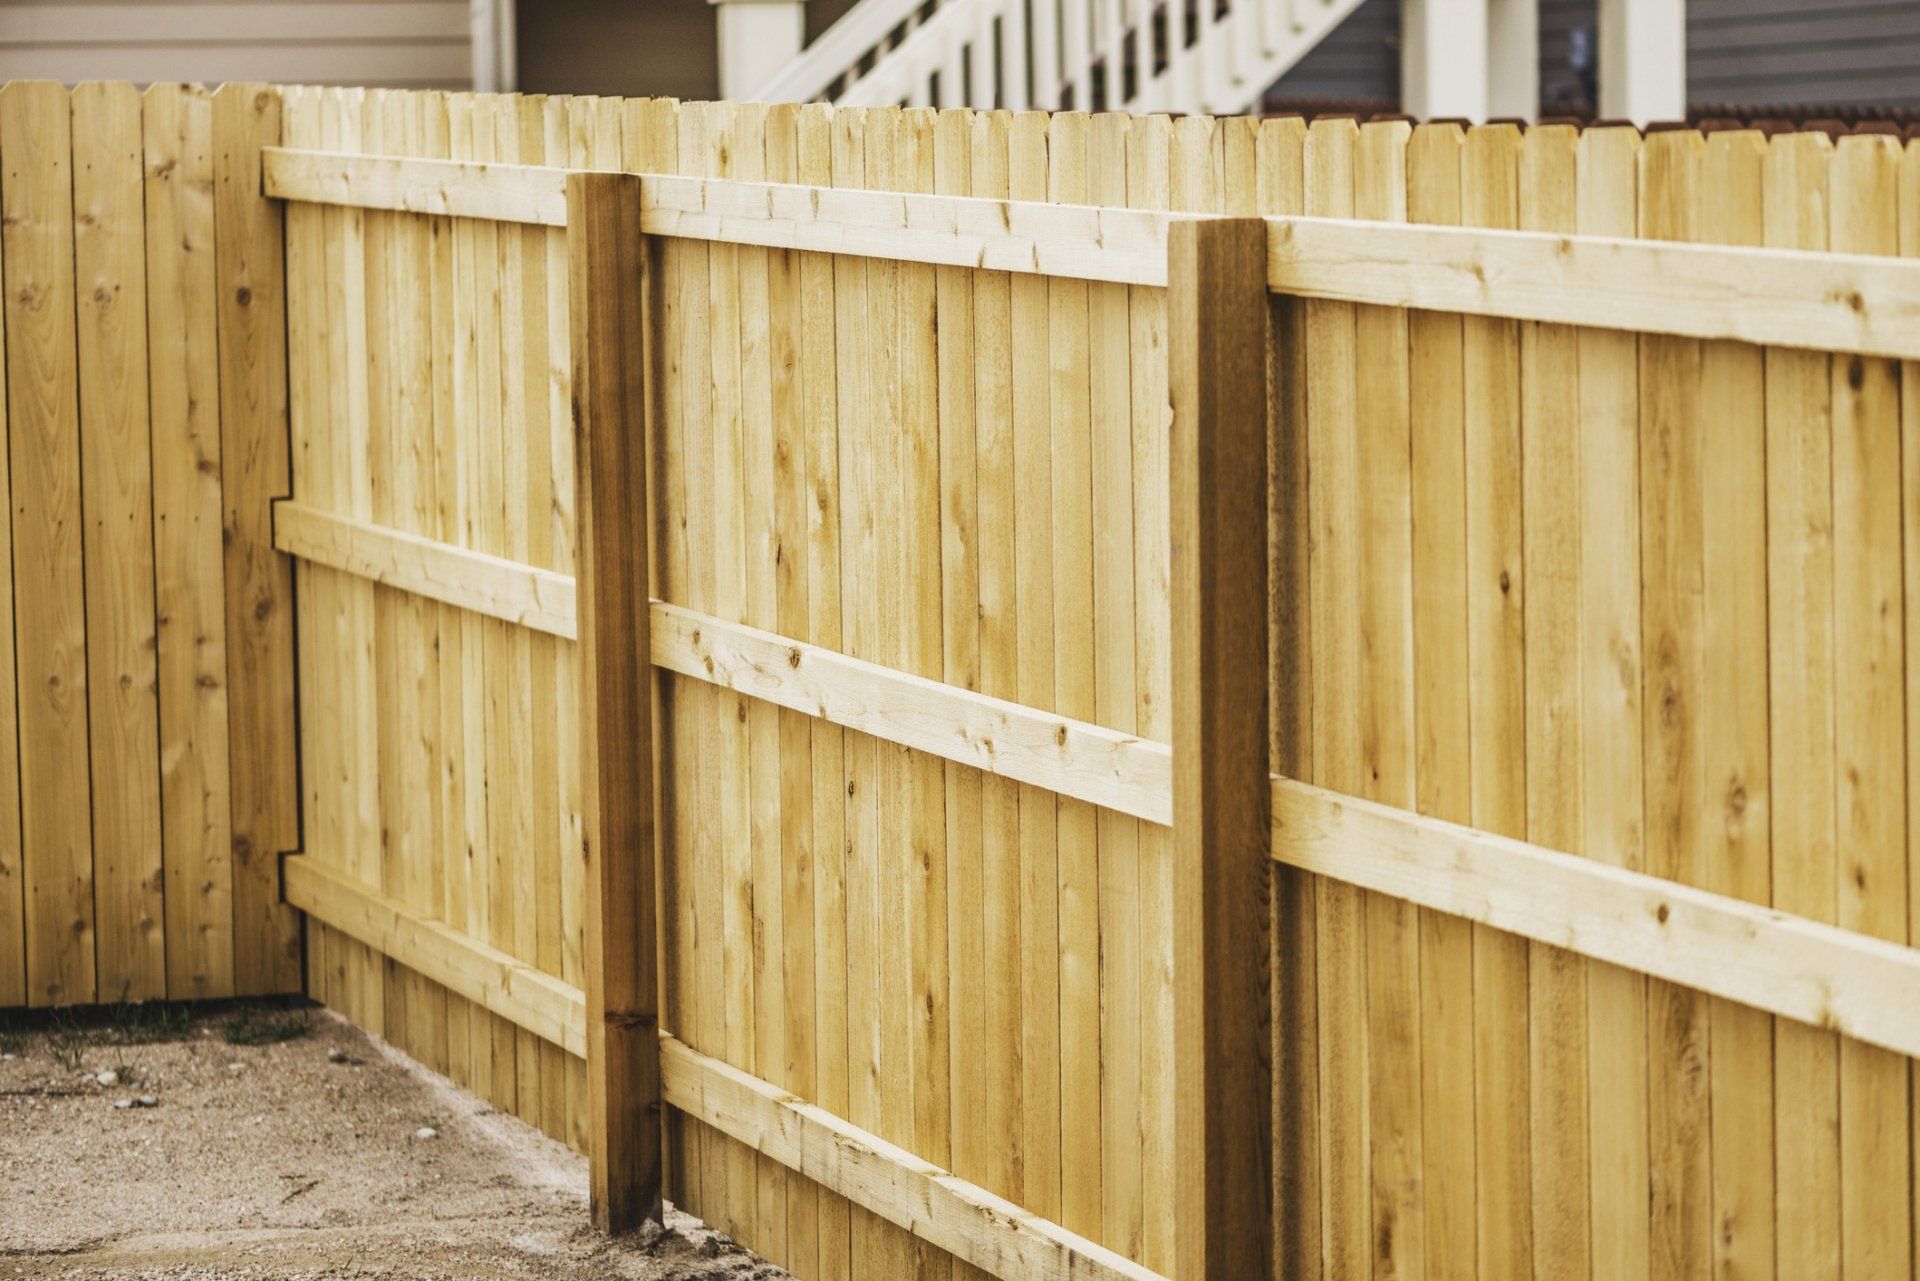
How to build a timber fence How to Build a fence in 6 easy steps Your reasons for wanting or needing a fence are determined by a variety of factors. You may want more privacy, a shelter from the wind, or to keep other pets out while keeping your own in. You might also want to add a nice finishing touch to your home. Materials Checklist TIMBER Posts Red Gum 125 x 75mm or or Treated Pine 100 x 100mm depending on type and height of fence. Be sure to allow for the part that goes in the ground (at least 600mm) Cross Hardwood or 75 x 50mm Rails Treated Pine top & bottom rails 75 x 38mm mid rail Palings Hardwood or 100mm and 150mm wide, Treated Pine half and half quantity Plinth Hardwood 150 x 25mm HARDWARE Cement Mix Stakes Timber bracing Galvanised flat head nails 40 x 2mm for under palings 50 x 2.8mm for over palings Galvanised bullet head nails 75 x 3.75mm for rails Timber post hole sole plates 300 x 250 x 50mm Red Gum Tools for the job Measuring Tape Pencil Power Saw or Hand Saw Hammer Carpenter’s Square String Line Spirit Level Wood Chisels Sliding Bevel Shovel or Post Hole Digger Step 1: Know your limits Before you begin building your timber fence , it goes without saying that you should be completely aware of what is yours. If you are unsure about the extent of your boundaries, consult your local council; you may require the services of a licenced surveyor. Don't rely on the title's accuracy, as previous owners may have robbed or borrowed a little here and there over the years. This also works both ways, and you may discover that a neighbour has previously snipped a piece of yours. Now is a good time to re-establish the proper boundary lines. Step 2: Setting the posts Your first task is to mark the fence line. Drive a stake into the ground at one end of the post and run a string line the entire length of the boundary; stake out the opposite end post. Then, at equal distances, measure and stake all intermediate posts. For a fence up to 1.8m high, posts are typically spaced 2m to 2.7m apart. Set both corner posts first to ensure that all of the posts are in a straight line. Make 600mm deep x 300mm square holes. Set your post about 1m into the ground for fences taller than 1.8m. Consider hiring or purchasing an auger-type post hole digger to make your job easier. Place a timber sole plate in the bottom of each hole before inserting the posts. Alternatively, a 50mm layer of concrete can be used in place of the timber sole plate. Place the post on top of the sole plate. You'll need to temporarily brace the post to keep it upright and straight. Special post struts may be required when installing posts in sandy soil. Completely fill the hole with a 50/50 mixture of soil and dry cement. Check the post with a spirit level and adjust the braces as needed to keep it square. Tamp the mixture down firmly to firm it up. To set the cement in the soil, add water to the ground mixture. Slope the mixture away from the post above ground to allow rain water to run off. Then, between the two end posts, stretch two string lines to align the ones that come between. They should be parallel to the string line. As with the corner posts, dig the holes and set each post in a mixture of soil and dry cement. Step 3: Fixing the cross rails The next job is to notch the posts for the rails. The top rail should be a minimum of 75mm from the top of the post’s final height. The bottom rail is set a maximum of 175mm from the plinth, and the mid-rail centred between the two. (If you’re planning to add a cap to your completed fence, the top rail is fixed flush with the top of the post – see ‘Cappings’, Step 5). The notches are made by sawing to the depth of the rail and chiselling out the excess. They should not be deeper than the depth of the rails provide for a flush fit. Now cut and nail on the rails on the rails using the 75 x 3.75mm galvanised bullet head nails. Joins in the rails should be butted together in the middle of a post and rail joints on posts should be staggered. Finally, nail on the plinth at the bottom of the posts, just keeping clear of the earth. Use your string line to make sure the plinth is straight. The palings rest on top of it and if it’s not straight, your palings will be crooked. Step 4: Now come the pailings Overlapping your palings creates a more private and appealing fence than simply butting them together. First, use the 40 x 2mm galvanised nails to secure the 150mm palings, leaving a 50mm space between each paling. Keep the palings vertical as you go, and check your spirit level frequently. Then, using the 50 x 2.8mm galvanised nails, nail the 100mm palings over the spaces so that they overlap 25mm on both sides. Drive these nails in without going through the I50mm palings. The palings can shrink without splitting as a result of this. Step 5: Topping off your fence Saw off the tops of the palings in a straight line 200mm above the top of the upper rail. This job is obviously easier with a power saw. A wooden straightedge, such as a batten, nailed on the back of your fence along the line to be cut makes a useful guide for sawing. The posts should be cut to the same height or just below the top of the palings. Make sure you cut at an angle for water to run off and to prevent rot. Cappings An alternative to straight cutting is capping your new fence. This will extend the life of the palings and give a more professional overall effect. In this case, your top rails must be fixed flush with the top of the post and palings flush with the top rail. Choose an angled capping that will shed water and completely covers the exposed ends of the palings. Fix using one 75mm galvanised nail every 600mm. Step 6: Finishing off To allow for normal timber shrinkage, this should be done about three months after the fence has been completed. If you used seasoned, treated radiata pine, you can stain and paint almost immediately. Finishing your fence is an excellent project for the kids. It should keep them busy for a couple of hours and earn them some extra money. Reach out to Pro Fences Brisbane to skip this entire process and have our professional team of fencing contractors in Brisbane build it for you.
